Friday, December 30, 2011

Caramel Apple Cheesecake Bars with Streusel Topping


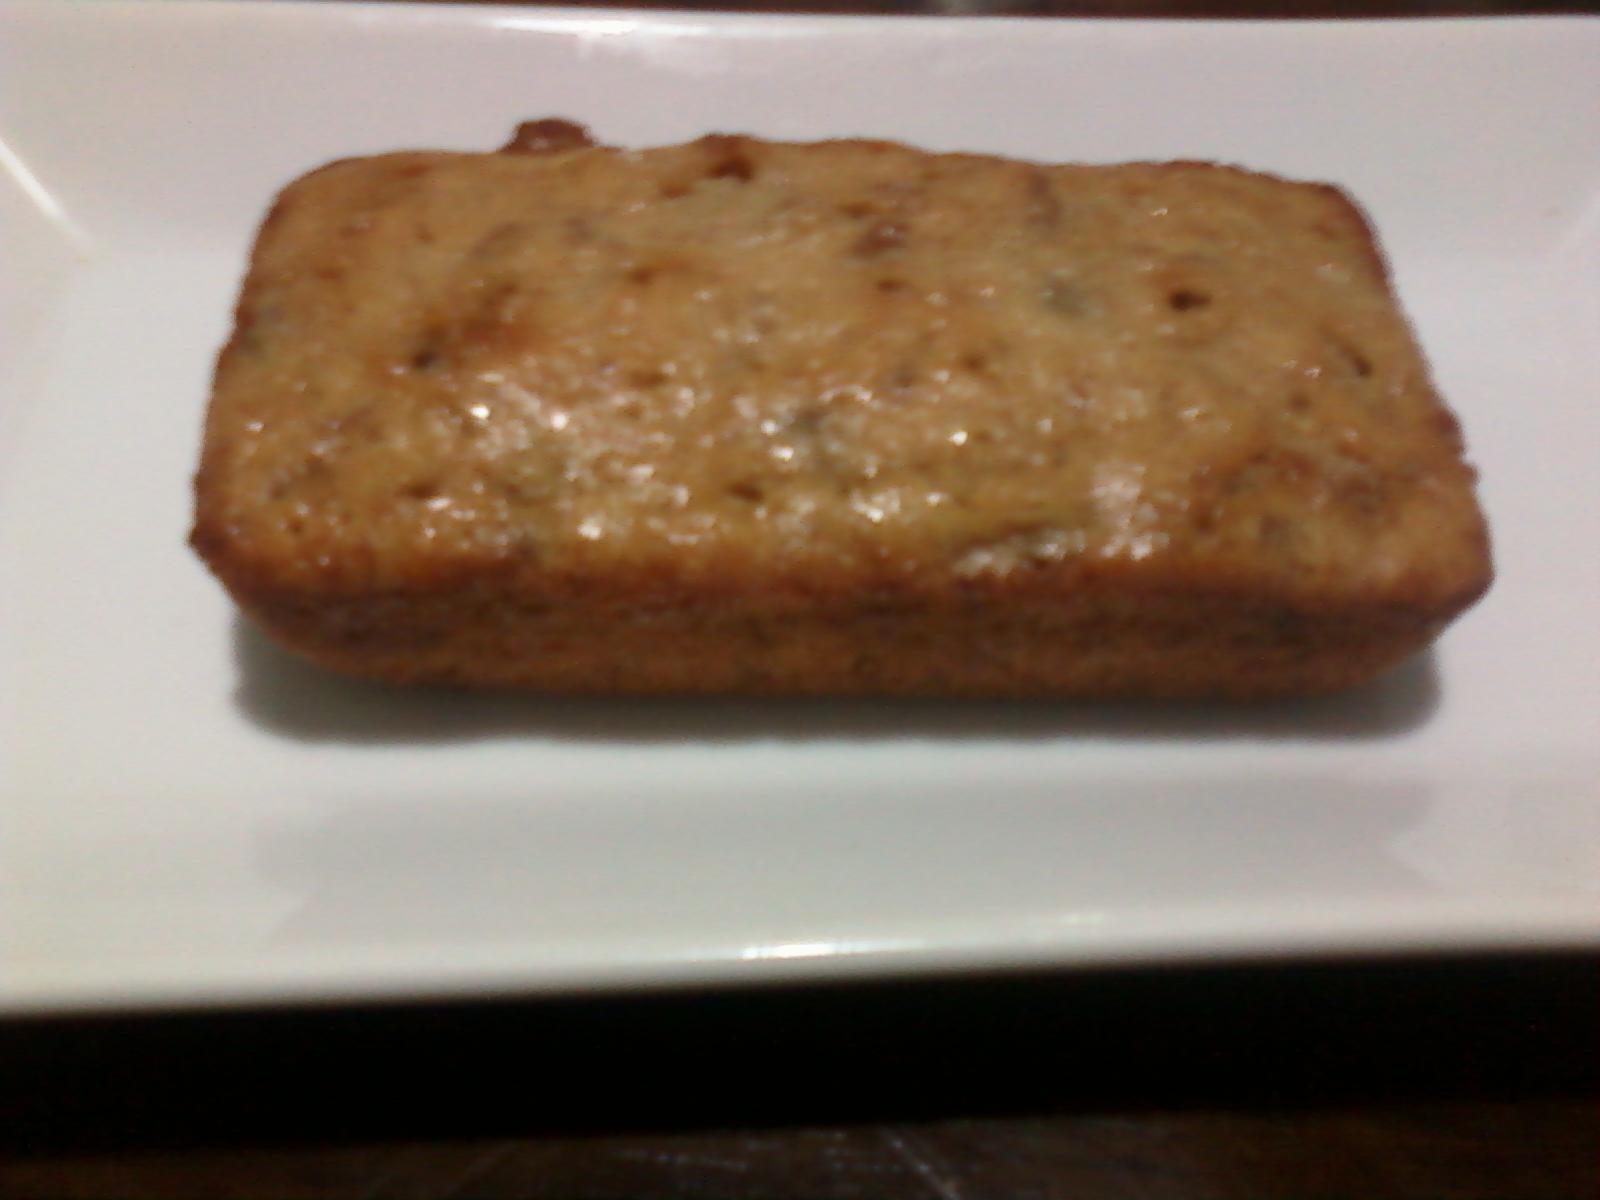
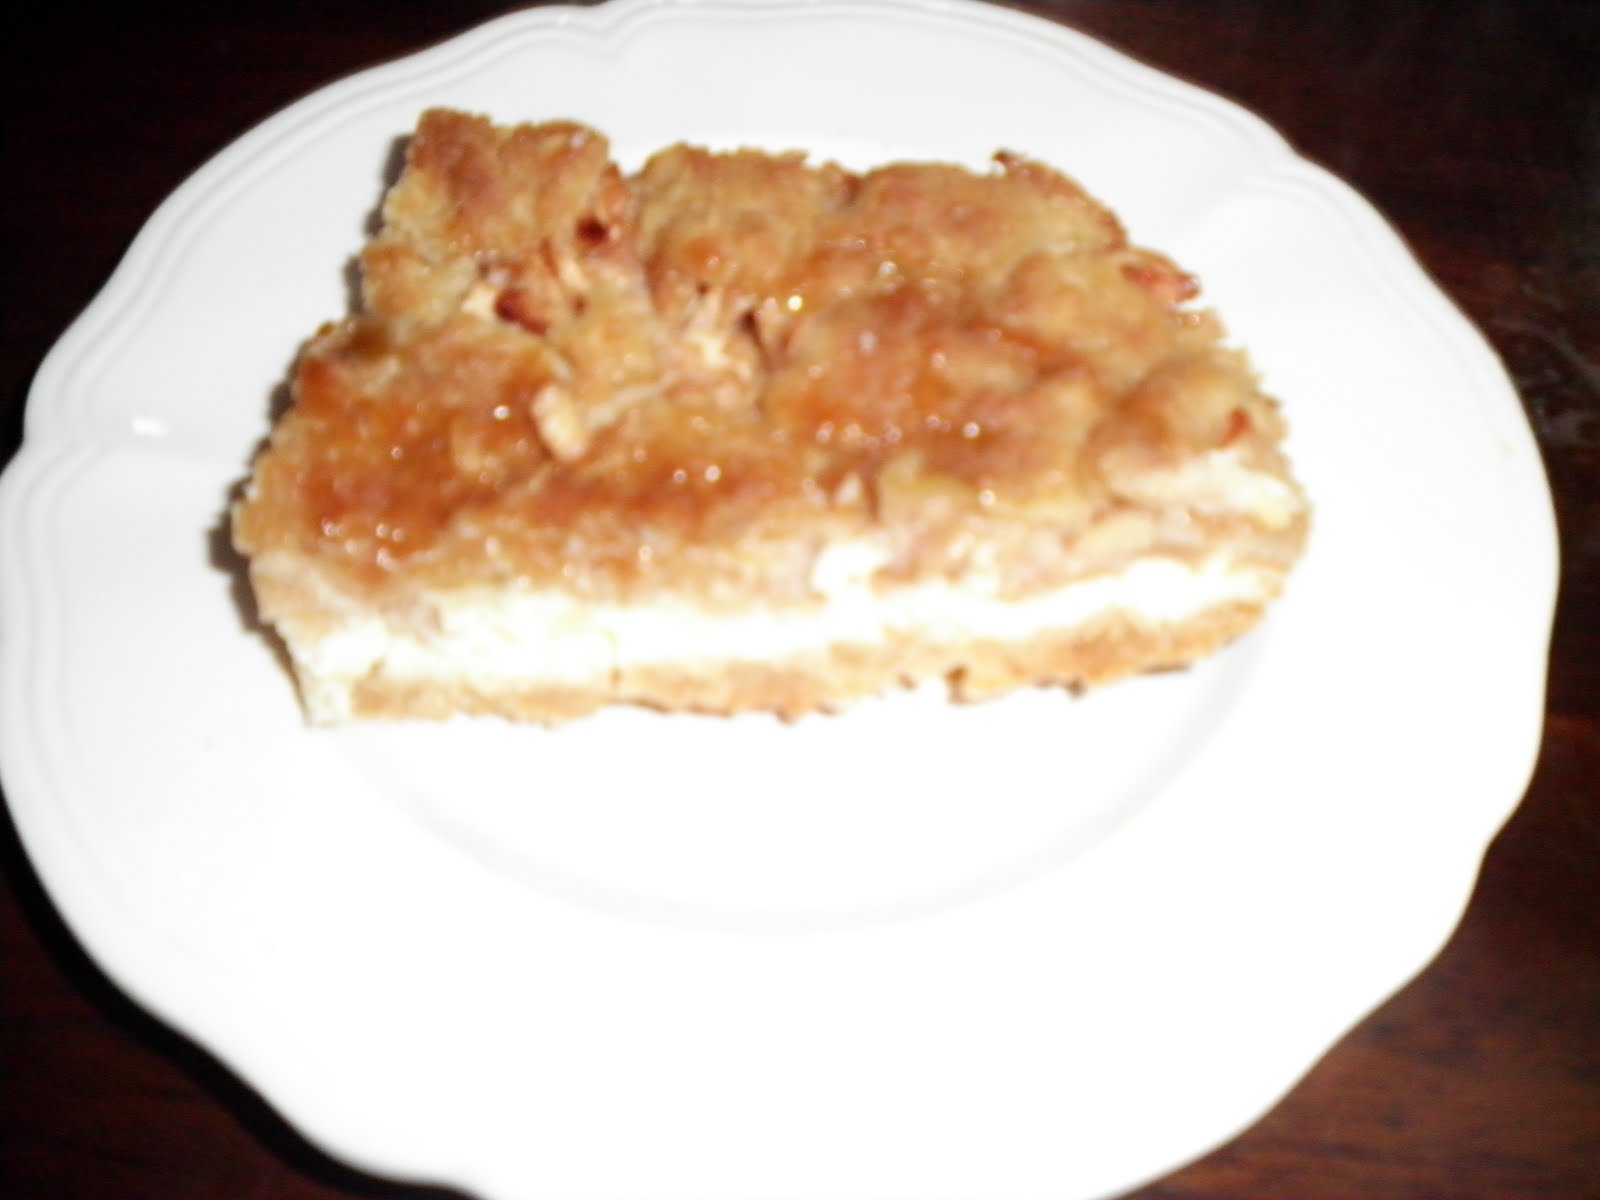
As soon as I saw "CARAMEL", "APPLE", and "CHEESECAKE" in one title I was SOLD! What a PERFECT winter dessert! The tart apples and warm caramel will warm ya right up!

I did not feel very confident about this dessert in the beginning because I thought that the crust was going to be too bland, but it is such a perfect balance of flavors and textures. Combined they equal the perfect dessert! This dessert serves about 20, and it was all gone the following day at my house! It always makes me so happy when my desserts go fast. I know I'm doing something right!

This dessert could be served warm or cold! Either way, they are going to love it!

And of course we have my idol, Paula Deen, to thank for this amazing recipe. You're going to love it y'all!

Ingredients:
2 cups all purpose flour
1/2 cup packed brown sugar
1 cup butter softened
2 (8 oz.) packs of cream cheese
1/2 cup sugar plus 2 tbsp (Separated)
2 large eggs
1 tsp vanilla
3 granny smith apples peeled, cored, and diced
1/2 tsp cinnamon
1/4 tsp nutmeg
1/2 cup caramel topping

Streusel Topping:
1 cup packed brown sugar
1 cup all purpose flour
1/2 cup oats
1/2 cup butter softened


Instructions:
1. Preheat oven to 350 degrees

2. Combine flour and brown sugar

3. Cut the butter in with a blender until the mixture is crumbly

4. Press into a 13x9 inch pan lined with heavy aluminum foil (I did not line my pan with foil. I just sprayed it with nonstick cooking spray)

5. Bake 15 minutes or until light brown

6. In a large bowl, beat cream cheese and sugar with an electric mixer until smooth

7. Beat in eggs one at a time

8. Add vanilla

9. Pour over warm crust

10. In a small bowl, mix together apples, 2 tbsp of sugar, cinnamon, and nutmeg

11. Spoon over cream cheese mixture evenly

12. Sprinkle streusel topping evenly over apples

13. Bake for 30 minutes or until set

14. Pour caramel topping over the cheesecake (I waited until it cooled so that the caramel did not melt into the bars and could be seen. Try heating the caramel over a cooled cheesecake bar for a real treat! )

14. Cut into bars

15. ENJOY!!!!

**I turned the broiler on high for about 3 minutes to brown the streusel because my cheesecake was set but I was not happy with the color of the topping. Worked out perfectly!)

Brownie Chocolate Chip Cheesecake


Recipe adapted from Foodnetwork.com, Eagle Brand Recipe

SWEET JESUS! You are in for a real treat with this one! This is BY FAR the best cheesecake I have ever tasted! I was sooooo excited when I took the sides off of the springform pan and saw how beautiful this cake turned out!

I couldn't get this bad boy on the table quick enough to show it off. I was sooo proud of this cake. It turned out so moist and rich. I love the difference in textures too...the creaminess of the cheesecake and the crunch in the chocolate chip...Score!

This cheesecake is sure to impress! It looks beautiful but surprisingly is not that hard to make.

Ingredients:
Pillsbury Classic Fudge Brownie
3 (8 0z.) blocks of cream cheese
1 (14 oz) can Sweetened Condensed Milk
3 large eggs
2 tsp vanilla
1/2 cup mini chocolate chips (I used regular size chocolate chips because I could not find mini chips and it turned out great)

Directions:
1. Preheat oven to 350 degrees

2. Spray 9 inch springform pan with nonstick cooking spray

3. Prepare brownies according to box instructions for "chewy" brownies

4. Spread brownie mix evenly in pan

5. Bake for 35 minutes or until set

6. Beat cream cheese until fluffy

7. Gradually beat in sweetened condensed milk

8. Beat in eggs and vanilla until mixed well

9. Stir in chocolate chips

10. Pour batter into prepared pan

11. Reduce oven temperature to 300 degrees

12. Bake for 50 minutes or until set (Mine took about 1 hour)

13. Cool and Chill

14. Remove side of pan and garnish as desired

15. ENJOY!!!

**I garnished my cheesecake with mini chocolate curls. To make chocolate curls use a vegetable peeler and run it down the edge of a chocolate bar. If the chocolate is too cool or too warm it will not work. Make sure the chocolate is a little cooler than room temperature.**

**Jiggle the pan before taking it out of the oven. You should be able to tell if the cheesecake is set. If the cheesecake is not set then the middle will jiggle a lot....a little tip my mom gave me.**


Thursday, December 29, 2011

Banana Cream Pie Cupcakes


Yes, you read that correctly! A banana cream pie cupcake! My mother said she was going to be making a banana cream pie for Christmas dinner dessert, and I thought "How cool would it be to have a banana cream pie cupcake?!" I searched some of my favorite web pages for a good recipe. I found one that looked good and added a garnish. I shared these cupcakes with my family and a few coworkers. One coworker described this little cup of cake as "banana bread on crack!" I think that about sums it up! These were a hit with EVERYONE who tried them!

Ingredients:
2 1/2 cups of all purpose flour

1 tbsp baking soda
1 tsp cinnamon
1/8 tsp salt
1/2 cup butter softened
1 cup sugar
3/4 cup light brown sugar
2 large eggs
1 tsp vanilla

1 cup mashed bananas
Graham crackers for garnish

Banana Filling:
1 pkg instant banana pudding (I used banana cream pudding)
2 cups milk
1 tsp vanilla

Vanilla Frosting:
1 pkg instant vanilla pudding
1 c. milk

1 tsp. vanilla
8 oz. whipped cream
1/4 cup confectioners sugar


**Make filling and icing ahead of time. They take about 30 minutes to thicken. You may have to use a little more confectioners sugar in the icing. Mine was a little thinner than I liked, but tasted great.**

Instructions:
1. Preheat oven to 375 degrees

2. In one bowl, mix flour, sugar, cinnamon, and salt

3. In a separate bowl cream together sugar and butter until fluffy

4. Add eggs and vanilla to sugar mixture

5. Add flour mixture alternating sour cream and bananas to the sugar mixture until just mixed

6. Fill cupcake liners about 3/4 of the way full

7. Bake for about 17 minutes (mine took exactly 17 minutes)

8. Cool completely before filling and icing


9. Cut out the middle of the cupcake with a paring knife in a cone shape and pipe in banana filling

10. Cover the filling with the cupcake that you cut out

11. Frost the cupcakes

12. Garnish with bananas, graham crackers, or whatever you like

13. ENJOY!!!

*To make the banana filling, mix all ingredients together and refrigerate.*

*To make the icing, mix ingredients together and then fold in the cool whip.*


Wednesday, December 28, 2011

Pumpkin Pie OHHH YEAHHH!


This year for Christmas dinner I wanted to go all out and try something fun with Pumpkin. I had no idea how upset my grandmother would get over this idea. Apparently, I am crazy for thinking that it would be fun to alter the traditional pumpkin pie. So to keep her happy, I made a very traditional pumpkin pie. But wow....Yummo!


Ingredients:

1/4 cup sugar

1/2 tsp salt

1 tsp ground cinnamon

1/2 tsp ground ginger

1/4 tsp ground cloves

2 large eggs

1 can pumpkin puree

1 12 oz can of evaporated milk

1 unbaked pie crust


Directions:


1. Mix salt, sugar, cinnamon, ginger, can cloves in a bowl


2. Beat eggs in a different bowl


3. Stir in pumpkin and spice mixture


4. Slowly mix in evaporated milk


5. Pour in pie shell


6. Bake in preheated oven at 425 degress for 15 mintues


7. Reduce temperature to 350 degrees and bake 40-50 minutes or until knife inserted in center comes out clean


8. ENJOY!!!


**Top with whipped cream!**

Chocolate Covered Pretzels


These are so easy, but everyone loves them so much I just had to share!


Ingredients:
Wilton Candy Melts (Any flavor or color)
Pretzels
Wax paper

Directions:
1. Heat the candy melts in a microwave safe bowl for 30 seconds at a time at half heat until smooth.

2. Dip the pretzels in the candy and place the pretzels on wax paper. You can heat another color or flavor of candy melts to drizzell over the pretzels.

3. Enjoy!!!

**Try rolling in sprinkles too! I used milk chocolate and vanilla candy melts. You can add food coloring to the candy but I would not recommend it. It made the candy harden, and it became hard to work with.**

Walmart carries little clear bags perfect to put these pretzels in and give as a gift or favor!


Sugar Cookies with Icing


It just would not feel like Christmas without sugar cookies! When I was a little girl my mother and grandmother made sugar cookies every year. They made several different coffee cups of icing in all different colors for my brother and I to decorate the cookies. I have such great memories decorating sugar cookies with my brother. I took the easy route and made drop cookies after battling the dough for some time, but my mother and grandmother always rolled the dough out and cut the cookies into wreaths, trees, angels.... My brother and I took turns selecting the cookies we wanted to decorate. Making these cookies brought back so many fond memories for me! What fun!

Adapted from Allrecipes.com

Ingredients:
2 3/4 cup all purpose flour
1 tsp baking soda
1/2 tsp baking powder
1 cup butter softened
1 1/2 cups white sugar
1 egg
1 tsp vanilla

Icing:
Confectioners Sugar
Milk
Vanilla

Directions:
1. Preheat oven to 375 degrees

2. Mix together butter and sugar until smooth

3. Beat in egg and vanilla

4. Slowly add flour, baking powder, and baking soda

5. Roll dough out (1/4 in) and cut out shapes with a cookie cutter

6. Bake 8-10 minutes or until golden brown

7. Cool completely before icing

8. Enjoy!!!

Okay, I really do not have measurements for the icing. I use about 2 cups of confectioners sugar and VERY SLOWLY (LIKE A TABLESPOON AT A TIME) add the milk. I used about a 1/2 teaspoon of vanilla for flavoring. The icing should be thick enough to pipe on, but not too runny. Add a drop of any color food coloring.

*I like my cookies a little soft, so I removed them just before they turned golden brown.*


Peanut Butter Blossoms


I love love love this time of year! I soooo enjoy baking for my friends, family, and neighbors. I made two batches of these bad boys and shared them with my loved ones. They were a hit! Who doesn't love peanut butter blossoms. I mean, seriously? I love these little cookies like WHOA!

Adapted From Hersey's

Ingredients:
3/4 cup peanut butter (creamy)
1/3 cup light brown sugar
2 tbsp milk
1 1/2 cups all purpose flour
1/2 tsp salt
1/2 cup shortening
1/3 cup sugar
1 egg
1 tsp vanilla
1 tsp baking soda

Directions:
1. Preheat oven to 375 degrees and unwrap Hersey's kisses

2. Beat shortening and peanut butter until well blended

3. Add sugar and brown sugar and mix until fluffy

4. Beat in egg

5. Beat in flour, baking soda, and salt

6. Shape dough into balls and bake an inch apart on a cookie sheet

7. Bake 8-10 minutes or until light brown

8. Immediately press kisses into the center of the cookies

9. Cool completely

10. ENJOY!!

* Hersey's instructs you to roll the dough in granulated sugar before baking, but I skipped this step. This recipe is supposed to make about 4 dozen, but I made my cookies a little bigger and got about 3 dozen. **


Tuesday, December 20, 2011

Eggnog Cupcakes with Bourbon and Eggnog Buttercream Icing


O.M.G. This is seriously the best cupcake I have ever tasted! It is so moist, light, and flavorful. Nothing screams Christmas like this cupcake! Forget the Pumpkin Pie, what an awesome dessert to serve after Christmas dinner!!! Even if you are not a fan of Eggnog, I know you will love this cupcake, you just have too. It's too good not to love! DEFINITELY LOVE AT FIRST BITE! And the icing....ohhhhh the icing.....I could eat it with a spoon! So lets get to the recipe!

Recipe adapted from Annies Eats

Ingredients
1 1/3 cups all purpose flour
1/4 tsp. baking soda
1/2 tsp. baking powder
1/2 tsp. salt
1/4 tsp. ground nutmeg
1/4 cup bourbon (Optional, also calls for dark bourbon. I used Jim Beam.)
1 cup eggnog
1/4 cup vegetable oil
1 tbsp. apple cider vinegar
1 tsp. vanilla
1 cup sugar

Frosting Ingredients:
20 tbsp. unsalted butter
2 1/2 cups confectioners sugar
Pinch of salt
Pinch of grated nutmeg
2 1/2 tbsp. eggnog
1 tbsp. rum (optional)


Directions:

1. Preheat oven to 350 degrees and line cupcake pan with paper liner

2. Mix flour, baking soda, baking power, salt, and nutmeg in one bowl

3. In a separate, combine eggnog, bourbon, vegetable oil, vinegar, and sugar with an electric mixer until well blended

4. Add the flour mixture to the eggnog mixture on low speed until just mixed

5. Divide batter evenly into lined cupcake pan

6. Bake between 22-24 minutes

7. Allow to cool and frost

8. Sprinkle with cinnamon or nutmeg

9. ENJOY

Frosting Directions:
Whip butter on high speed with eclectic mixer until fluffy
Add sugar, salt, nutmeg
Once mixed well, add eggnog
Beat in bourbon on low speed

*I halved this recipe for the icing. Normally, I am throwing tons of icing away but this was just enough! I added more bourbon and eggnog to my icing. I also added about 1/2 tsp of vanilla. I thought it tasted too much like the confectioners sugar, but the extra bourbon, eggnog, and vanilla was on point!

*This recipe is supposed to make 24 cupcakes, but it only made 14 for me. I filled the liners about 3/4 full*


Wednesday, December 14, 2011

Pumpkin Cupcakes with Cinnamon Cream Cheese Frosting


I made these delish Pumpkin Cupcakes with Maple Cream Cheese Frosting and Cinnamon Cream Cheese frosting. Both were so good, but OMG I was eating this icing right out of the bowl. Ughhhh sooo good!

Follow the link below for the Pumpkin Cupcake Recipe.
http://http//candysconfection.blogspot.com/2011/12/pumpkin-cupcakes-with-maple-cream.html


Frosting:

8 oz. block of cream cheese
4 tablespoons butter (room temp)
2 cups of confectioners sugar
Cinnamon to taste

Mix the cream cheese and butter until smooth. Slowly add Confectioners Sugar. Add Cinnamon to taste.

ENJOY!

Tuesday, December 13, 2011

Pumpkin Cupcakes with Maple Cream Cheese Frosting


Fall is in the air..no matter how much I rake my yard it still looks like one big pile of leaves, the nuts are falling off of the trees putting tiny little dents in my car, my dog and my boyfriend are tracking leaves throughout the house, I have to get up early enough to start my car before going to work...ugh Fall is in the air.

On a positive note...it's time for all of my FAVORITE pumpkin dishes, pumpkin pie, pumpkin dip, gooey pumpkin cake...and my newest love, PUMPKIN CUPCAKES!

This recipe for pumpkin cupcakes came from Food Network.

Ingredients:
1 c. all purpose flour
1 tsp. ground cinnamon
1/2 tsp. ground ginger
1/2 tsp. allspice
1/2 tsp. nutmeg
1/2 tsp. baking powder
1/2 tsp. baking soda
1/4 tsp. salt
1 stick butter, softened
1/2 c. sugar
1/2 c. canned pure pumpkin puree
1 1/2 tsp. pure vanilla extract


Frosting:
1 8 oz. block cream cheese
2 tablespoons butter, room temp.
2 tablespoons maple syrup (I used pancake syrup. Turned out great!)
2 cups powdered sugar


Directions:

1. Preheat oven 350 degrees, line cupcake pan with paper liners


2. Mix flour, cinnamon, ginger, allspice, nutmeg, baking powder, baking soda, and salt in a bowl


3. In a different bowl, add butter and sugar and cream together until fluffy


4. Then beat in the pumpkin and vanilla into the sugar mixture. Slowly beat the eggs in


5. Once mixed well, add the flour mix into the sugar mix and mix until well blended


6. Fill the cupcake wells until about 1/2 full


7. Bake for about 20 minutes or until a toothpick comes out clean


8. Cool before frosting

9. ENJOY!


Makes about 12 cupcakes


*For the frosting, mix cream cheese, butter, vanilla, and syrup. Slowly add the confectioners sugar until well blended*

Tip: These cupcakes turned out super yummy, but they did not rise as much as I thought they would. I would recommend filling the cupcake wells about 3/4 of the way full. Also, the cupcakes seperated from the paper liners, but I haven't figured out why...maybe my butter wasn't soft enough???


Pin It


Monday, December 12, 2011

PB&J Cupcakes


Aren't these just a cup full of cake fun?!?!

Seriously...I am out of control!!! I may need an intervention for all of this baking. I will be in gym overload as long as this baking blog keeps up!

Last night I made PB&J Cupcakes. I got the idea from, my sorority sister, Tori's blog. What an awesome idea! I made these yesterday, and my boyfriend's 6 year old son helped me put the icing on the cupcakes. It was such a fun project for the two of us!

I am ADDICTED to peanut butter, so I thought these cupcakes would be PERFECT!

I used a yellow cake recipe that I pulled from Tori's blog, the-sugarcoated.blogspot.com. Here is the recipe:

Ingredients:
1 1/4 cups all purpose flour
1 1/4 teaspoon baking powder
1/4 teaspoon salt
3/4 cup sugar
6 tablespoons unsalted butter, room temperature
2 large eggs, room temperature
1 teaspoon vanilla
1/3 cup milk

Preserves for filling, you choose the flavor!

For icing:
1 Cup Peanut butter
1 Cup Confectioners sugar
1/4 Cup + 2 tablespoons Heavy Whipping Cream
4 tablespoons butter

Directions:

1. Preheat oven to 350 degrees (I filled some of the cupcakes instead of cutting them in half. If you want to cut them in half and fill them, do not use liners. Just spray a cupcake pan.)

2. Mix flour, baking powder, and salt in a bowl

3. In a different bowl beat the sugar and butter together until well mixed

4. Add milk, vanilla, and eggs until well mixed

5. Slowly add the flour mixture to the wet sugar mixture

6. Pour into cupcake pan evenly

7. Bake 18-20 minutes

8. Cool before frosting and filling

9. Enjoy!

*I used a piping bag to fill some of the cupcakes. Some of them I cut in half and spread Smuckers Red Raspberry Preserves between the halves (like a sandwich). Then frost the tops!

Tip: If I make these again I will use more preserves. More preserves would balance out the peanut butter icing, but it's all in what you like!


Thursday, December 8, 2011

Chocolate Chip Cookie Dough Brown Butter Cupcakes


CHOCOLATE COOKIE DOUGH CUPCAKE? GENIUS!

WOW best cupcake EVER! I didn't think these would be my fav, but I made them because my guy loves cookie dough. Turns out, my new FAV!

I stumbled upon an awesome website, cupcakeproject.com and found this recipe. You can use any cupcake recipe with this icing and filling.

These are great for kids or you can pretty them up for your pals! Who doesn't love cookie dough right?!?!

Here's the recipe!

Brown Butter Cupcake:
1/2 cup + 2 tablespoons unsalted butter
3/4 cup self rising cake flower (I could not find cake flour, so I just used Pillsbury Self Rising Flour...not sure if there is a difference, but worked great!)
3 tablespoons sugar
5 tablespoons brown sugar
2 large eggs
1 teaspoon vanilla
2-3 tablespoons milk

Directions:

1. Brown the butter. Place butter in a sauce pan on medium heat and cooking until it turns a golden brown color. Stirring constantly.

2. Take the pan off of the heat and strain the butter into a bowl to remove sediment

3. Let the butter sit until it solidifies

4. When the butter is solid but soft, place in a food processor along with all of the cupcakes ingredients except milk.

5. Mix ingredients and add milk slowly until well mixed

6. Pour into cupcake wells about half way

7. Bake at 400 degrees for 15-20 minutes

8. When cupcakes cool, use a knife to cut out the centers

9. Place a ball of cookie dough in the middle

10. Cover the hole with the cake removed

Cookie Dough (egg free):
2 cups all-purpose flour
1/2 teaspoon salt
3/4 cup of unsalted butter (melted)
1 cup packed brown sugar
1/2 cup sugar
1 tablespoon vanilla
4 tablespoons milk
Any amount of chocolate (I used chocolate chips)

Icing:
Mix 1 cup cookie dough with 1 cup heavy whipping cream

Tip: I topped my cupcakes with a chocolate chip and shredded chocolate but you could also top them with cookie dough balls

I made 7 cupcakes with this recipe. I probably could have made 8 or 9 but I don't have a food processor so I used my smoothie maker. When I poured the batter out, there was batter in the bottom of the mixer that was not mixed well so I threw it out.

These are going to be a hit!!

Wednesday, December 7, 2011

S.U.G.A.R

I am in LOVE with this idea! These little sugar...things....would be great to decorate cupcakes or cakes! These are soooo easy to make!

>Pour some sugar (At least 1/2 cup) in a sauce pan and cook on medium-high heat until the sugar starts melting and liquifies. You can add more sugar at this point if it looks like you need more. Make sure you stir the sugar consistantly as it melts.
>When you smell the sugar starting to caramelize, take the sugar off of the heat.
>Continue to stir the sugar until it starts to pull like taffy.
>You can roll the sugar around a greased wooden spoon handle or greased knife sharpener and immediately pull off and place on parchment paper. You can also pour the liquid sugar over wax paper. It drys quickly and can be peeled off and used to decorate your cakes!

S.W.E.E.T!

Chocolate Covered Peanut Butter Mousse

I am the BIGGEST peanut butter fan EVER, so when I found this recipe in my new Pampered Chef cookbook I was sooo excited to try it! These are sooo good. The peanut butter mousse is light and fluffy and delicious!

The recipe makes 12, but I messed 5 of these up:( After all that hard work! And these are NOT easy to make. I was upset to say the least. I made these to give to my supervisor for her birthday, and she has to like them. They are too good not to L.O.V.E!

Here's how to make them!

Ingredients:

Glaze:
1 11.5 oz. bag of milk chocolate morsels
3/4 cup butter (1 1/2 sticks)
4 tablespoons light corn syrup

Mousse:
1 cup milk chocolate morsels
1/4 cup plus 2 tablespoons peanut butter
3 tablespoons butter
3 egg yolks
2 tablespoons sugar
3/4 cup heavy whipping cream

Directions:
1. For glaze, combine chocolate and butter in double boiler. Stir occasionally for 3 to 4 minutes until the chocolate is mostly melted. Remove from heat and stir in corn syrup.

2. Scoop enough glaze into a silicone floral cupcake pan. Use a basting brush and cover the sides of the wells. Refrigerate 5-10 minutes and repeat. Set remaining glaze aside.

3. Mousse-place chocolate, peanut butter, and butter in bowl and microwave for 1.5 minutes on high uncovered. Stir every 30 seconds. Stir until smooth. Set aside.

4. Whisk egg yolks and sugar in clean double boiler bowl. Cook on medium-high, whisking, until thermometer reads 140 degree F or 60 degrees C.

5. Pour egg mixture into mixing bowl and beat at medium speed slowly adding the chocolate mousse mixture.

6. Use clean beaters and beat the heavy whipping cream on medium-high speed until soft peeks are formed.

7. Fold whipped cream into chocolate mixture.

8. Spoon mousse into cupcake wells.

9. Reheat chocolate glaze for just a few seconds and pour the glaze over the mousse.

10. Refrigerate for at least 3 hours.

11. Turn the pan over on cutting board and press gently on wells to remove cakes.

12. ENJOY!

TIPS: I do not have a double boiler, so I used a stainless bowl and a sauce pan, it worked just fine ALTHOUGH this is how I messed up some of my cakes! Grrr! When I was tilting the pan to get all of the chocolate out of the pan, I poured water over a few of the wells:( Ugh, so sad! These things are FREAKING HARD to make!

Also, I sprayed the wells with nonstick cooking spray. Probably a bad idea. I think this made it hard for the chocolate to stick to the side of the wells. Directions do not instruct you to spray the wells, but I have never used a silicone pan before, so I did not know what to expect. I do not think that they will stick if you dont spray the wells.


Tuesday, December 6, 2011

Just a note...

I am SOOOO excited to try out my new silicone floral cupcake pan from Pampered Chef! I also ordered a cookbook with chocolate recipes, and OMG some of the recipes look AMAZING! Some of the cake and pie recipes I plan to alter a little and turn them into cupcakes in order to use my new pan.... this pan can only be described as pure awesomeness!

WOW, new pans, a new mixer, new cookbooks....this is getting legit!

I will be cooking up something new and AWESOME soon! I am up to my eyeballs in research articles! I turned in an 8 page paper tonight and have one more 20 page paper due tomorrow....and then I am ready for some SWEET STRESS RELIEF, Baking of course!

See ya!

Saturday, December 3, 2011

Key Lime Pound Cake and Pound Cake with Lemon Glaze

I finally bought a mixer! I know, your thinking "A baker without a mixer?" True. I was using a blender until last night. I wanted to hold out until I could by a nice mixer, maybe a Kitchenaid, but I couldn't use my smoothie maker ANYMORE! So I bought a simple hand held mixer, not the cheapest, but not the best either...but hey, it works!


I am SUCH a fan of lime! Key lime pie, Limeade, Mojitos, Margaritas, KEY LIME POUND CAKE...BRILLIANT!! This is a must try!

I used Paula Dean's recipe for "Mama's Pound Cake". You know it's gonna be good yall if it's a Paula Deen recipe! And as you know, "Butter is just a little stick of smiles and happiness!"

I used a very basic recipe for the glaze. The same recipe my mother and grandmother used to decorate sugar cookies at Christmas time, but I added a little key lime juice to one glaze and a little fresh squeezed lemon to the other.


Ingredients:

Cake:
1/2 pound of butter
1/2 cup vegetable shortening
3 cups of sugar
5 eggs
3 cups all-purpose flour
1/2 teaspoon salt
1 cup milk
1 teaspoon vanilla

Glaze:
1 Cup confectioners sugar
A little milk (about 2 tablespoons)
2 tablespoons of key lime juice OR 3 tablespoons of fresh squeezed lemon juice


Directions:
1. Preheat oven to 350 degrees

2. Cream butter and shortening together

3. Add sugar a little at a time

4. Add eggs one at a time

5. Mix dry ingredients in a separate bowl

6. Alternate adding the dry ingredients and the milk a little at a time

7. Mix in vanilla

8. Pour into a greased and floured pan

9. Bake for 1 1/2 hours or until a toothpick comes out clean

10. When the cake is cooled mix confectioners sugar, milk, and key lime juice until the glaze is loose enough to pour over the cake. OR cofectioners sugar, mile, and fresh squeezed lemon

11. Pour glaze over the cake

12. ENJOY!!!

Tips:
I divided this recipe in half after it was all mixed together and added 1/8 cup of key lime juice to half the batter. The taste is very subtle, but very good. Just enough!


Add the milk to the confectioners sugar a little at a time...a little milk and key lime or lemon juice goes a long way!


When sqeezing a lemon, squeeze it upside down so that the seeds do not fall into your glaze.


This recipe makes LOTS of cake batter! It was pouring over the sides of my bowl...hmmm note to self....get bigger mixing bowls! Anyway, this recipe made 8 of these little cakes! If you are using mini cake pans, you can cut this recipe in half. (Cute little cake pans courtesy of Mom Dukes...thanks Mom!)


Friday, December 2, 2011

Blueberry Crumb Cake


OH MY GOSH!  I am in love!  This cake is DE-LIC-IOUS!  It is good for desert or with coffee for breakfast!

Recipe from Foodnetwork.com

Ingredients:

Streusel:
1/4 cup sugar
1/3 cup light brown sugar
1 teaspoon cinnamon
1 teaspoon nutmeg
1 stick unsalted butter melted
1 1/3 cups all purpose flour

Cake:
6 tablespoons unsalted butter
3/4 cup sugar
2 large eggs (at room temp)
1 teaspoon vanilla
1/2 teaspoon lemon zest
2/3 cup sour cream
1 teaspoon baking soda
1/2 teaspoon salt
1 cup blueberries
Confectioners sugar to sprinkle over the top

Directions:
1. preheat over to 350 degrees. 

2. Combine all of the dry ingredients for the streusel and then stir in the melted butter, set aside

3. Cream butter and sugar in a bowl on high speed until mixed well

4. Add eggs, lemon zest, sour cream, and vanilla to mixture on low speed

5. In a separate bowl, mix flour, baking powder, baking soda, and salt

6. Add the flour mixture to the wet ingredients slowly with mixer on low speed

7. Fold in blueberries

8. Pour into a greased and floured 9 inch cake pan

9. Crumble the streusel mixture over the batter with your fingers

10. Bake for 40-50 minutes or until a toothpick comes out clean

11. After the cake is completely cooled, sprinkle with powdered sugar

12. Enjoy!!!

Tips: I would would recommend adding more blueberries.  To me, the cake could have used more.  Also, I added a little bit extra cinnamon to my streusel mixture.  Overall, this cake is sooo good!


BANGIN Banana Bread Minis


Gotta love Banana Bread! It's awesome for breakfast, dessert, or a snack. You can eat it warm or cold, with butter or without. You can make banana bread muffins or loafs...what a versatile little food! I like my banana bread with walnuts, but you could use pecan or leave the nuts out all together. My boyfriend is ALWAYS asking me to bake Banana Bread. He was a HUGE FAN of this recipe! This banana bread didn't last long around my house! I used mini loaf pans and wrapped each mini loaf separately for him to take to work for breakfast...cuteness.

Oh, and sorry the pics are so bad. I couldn't find my camera and had to use my cell phone camera...

I altered a recipe from Allrecipes.com and came up with this....

Ingredients

2 cups all purpose flour
1 teaspoon baking powder
1/4 teaspoon of salt
1/2 cup butter (room temp)
3/4 cup brown sugar
2 eggs 2 1/2 cups bananas (mashed)
1 1/2 cups chopped walnuts

Directions

1. Preheat oven to 350 degrees

2. Combine flour, baking powder, and salt in a bowl

3. Cream together butter and brown sugar

4. Stir walnuts into the butter and brown sugar mixture

5. Add the dry mix to the wet mix and mix together

6. Fold in mashed bananas

7. Pour into a greased loaf pan (I used mini loaf pans, makes 4)

8. Bake for about 60 minutes or until toothpick comes out clean (Bake time will be shorter if you use mini loaf pans like I did, hence "Banana Bread Minis")

9. Enjoy!

Tip: Peel and freeze bananas too ripe for your taste. Allow them to defrost and use them in Banana Bread. Works great!
Also, ripe bananas work best in Banana Bread!


Wednesday, November 30, 2011

Chocolate fudge cake pops


My research teacher made the class cake pops over the summer, and OH MY GOSH I fell in love! Cake pops are so fun! I had no idea how popular they were prior to making them. No everywhere I go I see books for making and decorating cake pops. I even saw a device to cook cake pops...crazy how popular these little things are. But seriously understandable because they are freaking DELICIOUS!

I did not follow a recipe with these. I just used a basic store bought cake mix and frosting and went out on a limb....but...YUM!

This recipe is so delicious! I love the contrast between the moist cake on the inside and the hard chocolate coating on the outside. I used half of the recipe below to make cake pops and the other half I used to bake cupcakes! This is such a fun recipe!

Ingredients:Chocolate cake mix (plus ingredients needed to make the mix that you have)
1 container of chocolate fudge frosting
Milk Chocolate melts (I use Wiltons)
Vanilla candy melts
Candy sticks

Directions:

1. Follow directions to prepare and cook the cake mix that you choose

2. Allow the cake to cool completely

3. Mix the cake and a container of chocolate fudge icing until smooth

4. Roll into balls, place sticks in the balls, and place in the freezer until firm


5. Heat chocolate melts in the microwave for 30 seconds at a time until smooth

6. Dip the balls in the chocolate until coated and allow to cool

Tip: You can stick the cake pop sticks into Styrofoam and allow them to cool. You can also place them on wax paper. I heated vanilla melts until smooth and drizzled over the hard chocolate!


Saturday, November 12, 2011

Caramel Apples on a whole-nother-level!


I am so excited! I just made the most awesome caramel apples! I was trying to get creative with these...MISSION ACCOMPLISHED! I made a caramel apple, a rocky road apple (with chocolate, pecans, caramel, and marshmallows), a caramel apple with chocolate and vanilla, and a caramel apple with pecans!!! Yummooo!

I have been a fan of anything apple my entire life, candy apples, caramel apples, apple pie, apple turnovers, apple butter...I seriously could go on forever!

When I was a little girl, I remember sitting beside my Papa Hall on the living room floor as I handed him an apple. He always laid in the floor with his head propped up on a small stool. He would pull out his pocket knife and peeled my apple handing me slices as he went along. Some of my fondest childhood memories are from time spent with my Papa and Grandma Hall.

Every year we went to the Virginia State Fair, and I brought home a candy apple. I always picked the apple with the most candy or caramel at the bottom. We have recently continued the tradition of visiting the Virginia State Fair, and I still refuse to leave without a candy and a caramel apple!

I can remember watching my grandmother make candy apples in the kitchen when I was a child. She always poured the candy over a stick for my brother to make him a sucker because he didn't like the apples. To this day, whenever I see an old friend of mine she mentions my grandma's candy apples. In fact, I saw her at the grocery store last night and she mentioned it.


Lets get to the how to....

I used a Concord Foods Caramel Apple Kit to coat the apples. The kit says it makes 10caramel apples, but half the kit only coated 4 apples.

Ingredients:
Caramel Apple Kit
1 c. milk
2 1/2 cups of sugar
apples

1. Mix the contents of the caramel apple kit with the milk and bring to a boil for 2 minutes on medium heat.

2. Stir in sugar. Stir occasionally.

3. Cook caramel to a soft ball stage or 242 degree Fahrenheit on a candy thermometer.
(If you don't have a candy thermometer, cook caramel until the caramel forms a soft ball when dropped into a cup of cold water.)

4. Let caramel sit 10 minutes.

5. Insert sticks into apples.

6. Roll apples in caramel.

7. Place apples on wax paper (I spray butter on the wax paper too.)

Tip: Dip apples into boiling water for a quick second to remove wax from apples before coating them with caramel. It may also help to chill the apples after removing the wax. This helps prevent the caramel from running off of the apples.

Pecan Caramel Apple: I chopped pecans into very small pieces and rolled the apple in the pecans.

Caramel with Vanilla and Chocolate Apple: I melted candy wafers (vanilla and chocolate) in the microwave on defrost until smooth when stirred. I then drizzled the chocolate and vanilla over the apples and immediately refrigerated.


Rocky Road Apple: I rolled the caramel apple into the pecans and added marshmallows while the caramel is still warm. I then drizzled chocolate (see above) over the apple and immediately refrigerated.


These apples were a hit with my boyfriend and his 6 year old son! I am so excited about them! I can't wait to experiment more!!!

Friday, November 11, 2011

Momma's Pecan Pie


For the first time last night I made a pecan pie. I turned out so good! I wish I could share the recipe, but I was sworn to secrecy! But don't worry, I plan to tackle lots of recipes that I will be sharing in the future!

Coconut Pie


So, I made first made this delicious coconut pie when I met my boyfriend and learned that he loves coconut. I got this recipe from my mom, but I added a little more coconut than she does. My mom always says, "The way to a man's heart is through his stomach." I made this pie every week when my boyfriend and I started dating. He couldn't get enough!

Ingredients:

2/3 c. sugar
1 c. evaporated milk
1 jumbo egg
2/3 teaspoon cornstarch
1 1/4 c. coconut
1/4 c. melted butter
1 pie crust (frozen)

Directions:

1. Preheat oven to 350 degrees

2. Mix dry ingredients (sugar and cornstarch) together in one bowl

3. In a separate bowl mix the vanilla, egg, and evaporated milk

4. Mix the two bowls together

5. Lastly, add the coconut and melted butter

6. Mix well

7. Bake at 350 degrees for about 45 minutes. The coconut should be golden brown

8. ENJOY!

Tip: I combined all of the wet and dry ingredients in one bowl together before adding the coconut to avoid having to wash more dishes.  Lazy? No.  I just HATE washing dishes and I don't have a diswasher.  Maybe Santa will bring me one...  Anyway, the pie turned out wonderful!